Leave Your Message

10 Best Gel Nail Polish Sets for Beginners and Pros

Choosing a Gel Nail Polish Set can feel simple until you compare lamp types, brush sizes, color ranges, and curing instructions. A beginner may want clear directions and a few forgiving shades, while an experienced user may prefer finer brushes, flexible color choices, and dependable wear. The best kit is not always the one with the most bottles. Small details matter. A compact lamp that fits comfortably on a desk, polish that applies evenly near the cuticle, and clearly labeled steps can make a home manicure less frustrating.

This guide explores 10 gel nail polish sets for beginners and pros, with attention to usability, included tools, shade selection, and overall value. It also considers practical details, such as whether the lamp suits the polish and whether instructions explain curing times. Follow each product’s directions, avoid getting uncured gel on your skin, and stop if irritation develops. Those precautions are easy to overlook when a fresh color looks tempting. Still, no kit is perfect: one may offer beautiful colors but sparse instructions, while another includes useful tools but fewer shades. Some impressions also depend on nail shape, application technique, and personal preference. The comparisons ahead aim to make those trade-offs clearer, so readers can choose a set that fits their skill level and routine rather than relying on bottle count alone.
10 Best Gel Nail Polish Sets for Beginners and Pros

Understanding Gel Nail Polish Sets and How They Work

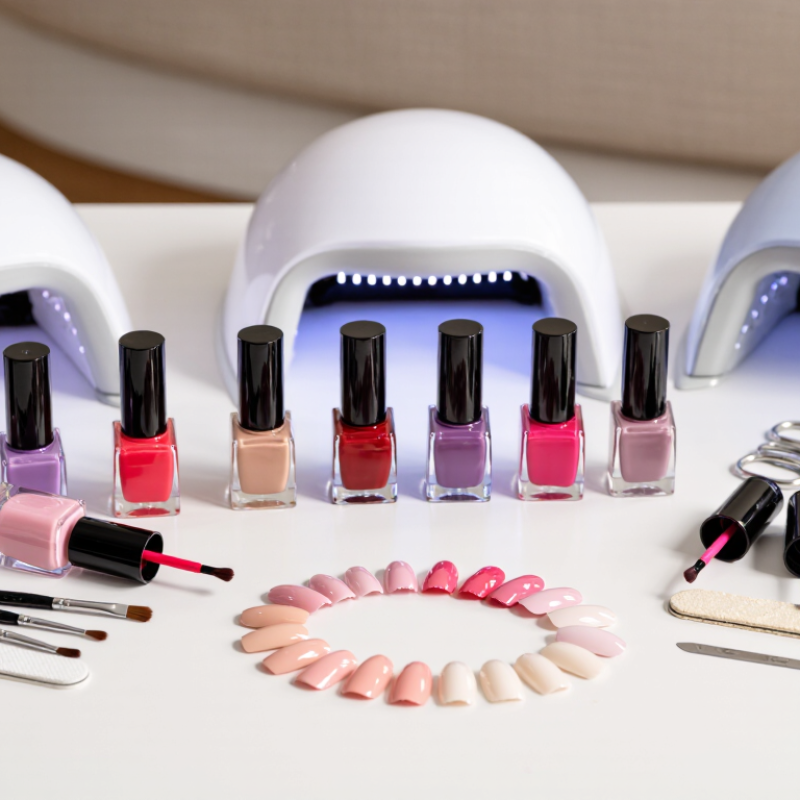
Gel nail polish sets pair a base coat, colored gel, top coat, and curing lamp. Unlike regular polish, gel hardens through photopolymerization: light activates ingredients that form a durable coating. The lamp’s wavelength and curing time must match the gel’s instructions. A glossy surface can still hide a soft, undercured layer. Apply thin coats, keep product off the skin, and cure each layer for the stated time.

Lamp safety deserves attention, too. A 2023 Nature Communications study exposed cultured cells to nail-dryer radiation for 20 minutes and reported DNA damage and cell death; repeated exposure also produced mutations. These were laboratory findings, not a measurement of risk from ordinary manicures. Still, they show why exposure time and sensible precautions matter. Gel removal also takes patience: peeling can strip surface layers from natural nails.

Tips: Check that your lamp is specified for your gel, rather than assuming all lamps work alike. Cure thumbs separately if their angle leaves part of the nail shadowed. Follow the removal directions, and stop if polish touches surrounding skin. Even careful routines can feel fiddly; that is worth remembering.
Key Features to Consider When Choosing a Set

A useful gel polish set should match your lamp, skill level, and usual manicure routine. Check that the lamp’s wavelength and curing instructions suit the included polishes; wattage alone does not guarantee a proper cure. Follow the product directions, including curing times and coat thickness. Uncured gel can irritate skin, so avoid letting it touch your cuticles. Look for a base coat, color coats, and a top coat, with clear removal guidance. Small details matter.

Tips: Choose a set with a few wearable shades and clearly labeled bottles. Test each color on a nail wheel if available; photos can make sheer polish look opaque. Keep gel off skin, and stop if irritation develops.

Brush quality affects control, especially near the sidewalls. A smooth, moderately sized brush is often easier for beginners than a very wide one. Pros may prefer more shade variety or refill options. Also check what tools are included, such as a file or lint-free wipes, and whether they are genuinely useful. Some large kits look generous but contain many shades you may rarely wear. That is not necessarily a deal-breaker, but consider storage space and the amount of polish in each bottle. Choose readable ingredient and safety information, too; vague instructions are a reason to compare another set.

10 Best Gel Nail Polish Sets for Beginners and Pros - Key Features to Consider When Choosing a Set

Set Type Typical Color Count Lamp Included Typical Curing Time Common Contents Best For Key Feature to Consider
Starter Essentials Set 6–8 shades Usually a compact LED lamp, around 6–12 W Often 60–90 seconds per coat; follow the polish instructions Base coat, top coat, a small shade selection, file, and basic prep tools First-time users who want to learn a simple gel routine Check that the lamp can fit the fingers comfortably and is compatible with the included polish.
Everyday Color Set 10–12 shades Often a 24–36 W LED lamp Commonly 30–60 seconds per coat under a compatible LED lamp Neutral and seasonal colors, base coat, top coat, and manicure basics Home users who want a versatile selection for regular manicures Look for clearly labeled curing directions and a mix of light and dark shades.
Neutral and French-Manicure Set 6–10 shades May include a small LED lamp or no lamp Usually 30–60 seconds per coat with a compatible LED lamp Sheer pinks, nudes, white polish, base coat, top coat, and sometimes a detail brush Users who prefer understated manicures or French tips Sheer shades may need additional thin coats for even coverage.
Wide-Color Collection 18–24 shades Often a 36–48 W LED lamp, if included Typically 30–60 seconds per coat; thicker or highly pigmented layers may need careful curing Broad color range, base and top coats, and basic application tools Experienced home users who like to change colors often Check bottle size and ingredient or allergy information as well as the number of shades.
Mini-Bottle Trial Set 8–12 shades Usually sold with a compact lamp or as a polish-only set Depends on the lamp and formula; use the stated curing time Small bottles, a few coordinating colors, and sometimes base and top coats Beginners testing colors before investing in full-size bottles Compare bottle volume, since a high shade count can come with smaller bottles.
Builder-Gel Starter Set 2–6 builder shades, often with clear or nude options Usually a 36–48 W LED or dual-source lamp Often 60–120 seconds per layer; product directions take priority Builder gel, base coat, top coat, forms or tips, and application tools Users learning to add structure or a small amount of length Builder gel requires controlled application and full curing; it is a more involved choice for beginners.
Soak-Off Removal Set 4–8 shades Often includes an LED lamp, but some sets do not Commonly 30–60 seconds per coat with a compatible lamp Gel colors, base and top coats, removal wraps or clips, and a file Users who want a kit with removal supplies for at-home use Confirm that the polish is soak-off gel and follow its removal directions; avoid peeling cured product.
Nail-Art Practice Set 8–16 shades Often a 24–48 W LED lamp Varies by product and layer; cure each layer as directed Color polishes, liner brushes or dotting tools, and sometimes glitter or foil Users practicing simple nail-art designs at home Fine details work best with suitable art gels or brushes, and each layer still needs proper curing.
Travel-Friendly Set 4–8 shades Compact LED lamp, commonly USB-powered May take longer than a larger lamp; check the lamp and polish instructions Small bottles, a portable lamp, and a few essential tools Users with limited storage or those who travel Check the lamp's power source, size, and curing compatibility before choosing a portable kit.
Salon-Style Home Set 12–20 shades Often a 48 W LED or dual-source lamp Commonly 30–60 seconds per coat under a compatible lamp Color collection, base and top coats, prep tools, and a larger lamp Confident users seeking a more complete home manicure setup Prioritize reliable curing instructions, comfortable lamp fit, and complete safety information over wattage alone.

Note: Contents and curing times vary by formula and lamp. Apply thin layers, keep uncured gel off the skin, and follow the instructions supplied with the products. Do not use gel polish unless it can be cured with the specified lamp.

Essential Tools and Safety for Gel Nail Application

A beginner-friendly gel set should include a lamp matched to the polish, a fine file, lint-free wipes, and a cleanser. Check the lamp’s instructions rather than guessing at curing time. Thin, even coats reduce wrinkling and sticky patches. Keep uncured gel off the skin; repeated contact with acrylates can trigger allergic reactions. Work near an open window or use local ventilation, and keep bottles closed between coats. Small details matter. So does patience.

A 2023 Nature Communications study found that one 20-minute exposure to a UV nail dryer caused 20–30% cell death in laboratory cell samples; repeated exposures caused more. These were controlled cell experiments, not a measurement of cancer risk from a home manicure. Still, they support sensible precautions: follow lamp directions, avoid unnecessary exposure, and consider fingerless UV-protective gloves. The American Academy of Dermatology also advises applying broad-spectrum sunscreen to the hands before gel manicures. I might be overly cautious here, but curing skin contact by accident is not a shortcut worth taking. Check your nails between applications, too; peeling or soreness is a reason to pause and reassess your routine.

Comparing 10 Gel Nail Polish Sets for Beginners and Pros

Comparing ten gel nail polish sets means looking beyond the number of colors in each box. A beginner-friendly set usually includes clear instructions, a compatible curing lamp, and a few practical shades. Check the lamp’s stated curing requirements rather than assuming every gel works with every lamp. An under-cured layer can stay soft beneath the surface, so thin coats and the correct curing time matter. Small details count.

For regular home use, compare bottle size, brush control, and how easily the color applies near the cuticle. A wide shade range looks appealing, but a smaller selection of wearable colors may get used more often. Some kits include base and top coats, while others require separate purchases; compare the full setup cost. Read the removal directions, too. Peeling or forcefully scraping gel can damage natural nails.

More experienced users may value denser pigmentation, flexible color choices, and reliable results across several coats. Still, a crowded kit is not automatically a better one. Look for clear ingredient and safety information, and follow the product directions, including ventilation guidance. A comparison chart can help, though it may miss how a brush feels in your hand. That part is surprisingly personal.

Gel Nail Polish Sets: Typical LED Curing Times by Layer

LED curing times commonly range from about 30 to 60 seconds per layer. These values are general reference points, not a comparison of specific sets; always follow the instructions for your gel polish and lamp.

How to Apply, Cure, and Remove Gel Polish Properly

Prepare nails gently: wash and dry them, push back cuticles, and lightly remove surface shine. Keep it simple. Apply very thin coats, keeping gel off the skin. Cure each coat for the time specified for that gel and lamp; keep fingers flat and cure thumbs separately if needed. An incompatible lamp or rushed curing may leave gel undercured, even when the surface looks dry. Sticky residue can be normal for some systems, so follow the product’s directions rather than adding extra curing time automatically.

For removal, do not peel. File the shiny top layer, then use the soak-off method and timing specified for the product. Lift softened gel gently; if it resists, pause and soak again instead of scraping the nail. A 2023 Nature Communications laboratory study found cell damage after exposure to UV nail dryers, including 20–30% cell death after a 20-minute exposure. These were cultured cells, not people, so the findings do not establish the risk from a typical manicure. Still, reduce unnecessary exposure: consider UV-protective fingerless gloves or broad-spectrum sunscreen on the hands. I sometimes rush removal; that is exactly when nail plates get roughed up.